Jaguar XJS Brake Accumulator Diagnostics

Jaguar XJS Brake Accumulator Diagnostics and Replacement

That’s it. I’m fed up. It’s 01:00 AM in the morning. I was going through the specs of accumulator bulbs - to find something 3x cheaper than currently available overpriced rubbish on the market and fully refillable (with refill valve). Results coming out soon...


Accidentally – I went through the articles related to brake accumulator testing (even those written by famous XJS owners…) – excellent, outstanding, almost like J.K. Rowling and Harry Potter – not true and fascinating. 


Primary Rule – omitted on all toilet-read forums so far: 

IF SOMETHING WORKS - DON'T FIDDLE WITH IT!!! Remember that every unload test has nothing to do with normal operation of XJS Brake Accumulator - you're streching the membrane in accumulator's sphere - DON'T be an absolute wanker and don't perform this test every Sunday!


Also, be aware that most of the used Brake Accumulator Assemblies are on eBay – priced for total losers, delusionists or simply wankers. How destructive idiot you need to be – to pay 200-400 Pound Sterling for piece of used junk . I bought few of those – last came for the price of £5, plus £15 delivery. Cheap shit… 

Here’s how it works:


1.    Pressure Accumulator sphere
Thingy containing a gas trapped inside with use of membrane (not bladder as everyone thinks – bladders can be refilled) Gas can be compressed with hydraulic fluid filling up the thingy. Precisely – with brake liquid. To keep the pressure in XJS brake system and help you when you’re pressing the brake pedal hoping to stop 2.3tonne gravedigger.

2.    Hydraulic pump
Most rusty item in the area with a shape of your Budweiser can. Actually, it’s an electric motor that pumps the liquid into the thingy from pt.1.

3.    Pressure Switch.
As name suggests – an electric switch that turns something on and off. As name also suggest – it’s being switched on by dropping pressure and switched off by increasing pressure. It operates the pump from pt.2.

4.    There must be some sort of one-way valve involved (in assembly or remote) as the pressure stays in the accumulator sphere (at least for a while) once pumped. Goes out while you’re pressing brake pedal, increasing brake fluid pressure which in consequence – opens the valve. 


That’s the concept. Hopefully it makes sense. If not – please click Here.

Chapter 1: Jaguar XJS Brake Accumulator Basic Check

How to test Jaguar XJS brake accumulator unit: forget about bullshit with seconds of pump running, amount of brake punching, straw inserting – to diagnose if your Pressure Accumulator Sphere is good or bad. It’s not about sphere by entire assembly. That’s right – I repeat: Brake Accumulator ASSEMBLY not only accumulator sphere. If all three points are assembled together – all of those may fail. The good news is - each component in assembly may help to find issues with the rest of them.

If pressure accumulator sphere fails completely - you will probably hear pump running pretty long with uniform revs until it will start to glow and screeeeeaaam, then it will slow down rapidly and stop. You will be able to diagnose it with test no 1. (below).

If brake accumulator's electric pump fails – you will hear nothing (motor) or electric pump will run with the same speed until cooked completely (eccentric compressor fail). You will have no pressure loaded into accumulator sphere and hard brakes. However, if the pressure switch fails – it won’t switch the pump on or won’t switch it off giving  you false information about the issue. You will be able to diagnose it with test no 2 (below).

If brake accumulator's pressure switch fails – it will react to the pressure incorrectly or won’t react at all, that includes:
-    switching the pump with every brake pedal stroke (switching the pump pressure accumulator sphere even if sphere is fully functional and loaded full),
-    switching it too frequently (switch-on pressure too low and switch-off pressure too low)
-    no pump switching at all (rare and more related to fault in electrical circuit)

If your rear brake callipers are seized – brake accumulator may simulate better condition than it actually is (until ABS kicks in).

Chapter 2: Jaguar XJS Brake Accumulator Extended Check

Below are the variables to collect. All variables are connected to and can impact each other. All of those will be required for the final diagnose.

Tools Required:
-    Commons Sense
-    Judgement
-    Multimeter
-    OPTIONAL: Inline Hydraulic Pressure Gauge (nice to have, but you’ve bought your accumulator sphere without checking entire assembly and now you’re in debit)

2.1.    Diagnose Pressure Accumulator Sphere first :
As you are probably not aware – your brake accumulator must hold much more pressure than you expect. It’s called Engineering Safety Factor. Without appropriate factor and with critical automotive system involved (brakes/ABS) – I’m guessing it’s equal or higher than 5 (holds 5+ times the volume of pressure required to operate). Your brake accumulator’s pump kicks in at 140bar (Bar, not PSI!!!), switches off pump at 180bar. It also allows brakes/ABS to operate until pressure goes below 80bar (actually 72bar-ish, tested) That’s why the theories of 10% pressure capacity loss (operating capacity) per year are probably true, but misleading:

-    Switch on ignition and start the car normally. Run for 2 minutes, don’t listen to your pump or other crap yet.
-    Switch off the car and start depressing pedal with moderate force and count times until brake pedal will become stiff. While depressing it, at some point you will start to experience a feeling of brake pedal hitting “metal bar” when depressed. It’s something similar to the feeling of brake pedal dropping to the floor – but with every stroke getting higher and higher until it’s right on top of the press   
-    If you’re making 30-40 strokes before feeling of “metal bar” coming to the top – pressure accumulator sphere should be in acceptable condition. Unfortunately, this is perception-based as you will press the pedal with various force… You need some common sense and additional checks below.  

2.2    Check brake accumulator’s hydraulic pump :
This is the check where you can finally use your advanced mathematical skills and count the seconds. It also gives feedback to pt.1 :

-    With ignition off – press the brake pedal firmly until muscle pain will prevent you doing so -usually 50-4000 times (go for 4000!)
-    Switch on ignition - don’t start the engine - begin the count immediately (for non-UK based owners) or use your mobile phone’s stop watch to count it for you and decrease test uncertainty and possible count errors.  Listen if your hydraulic pump while building-up the pressure. It should run freely (sound uniform, high revs) from the beginning. Note the seconds from start in the moment where pump revs start to quickly slow down. Then, note the overall time from start until stop of the pump.
-    Any high rev spikes in the pump sound may suggest air bubbles in the system – ignore it, unless your brake pedal goes spongy
-    If your pump’s motor is dying – it may be running loud as well.
-    If pumping sound is longer than 90 seconds or extremely short – probably you have issue with pressure switch – IF checks 1-2 are ok. (alternatively – you’ve just changed your Pressure Accumulator Sphere and wanking yourself/hoping that eccentric hydraulic pump will pump the air out of the system (word of the day: BLEED).

2.3.    Check brake accumulator’s pressure switch:
This simple device allows only 2 simple checks: First – multimeter. Check resistance of the pressure switch connectors – it should be somewhere between 600-800 kilo-ohms you TWAT – this is a switch, you cannot check its resistance and even if you could – it has nothing to do with switching function (probably, now you won’t buy me a beer, will you?) – either it works or not. In case of electrical circuit breakage in the switch/wiring – ABS and brake warning lights will be displayed on your dash.
You can however perform test with use of inline hydraulic pressure gauge – and you have perfect place to screw it in. But you don’t have a gauge and you’re missing the unions allowing you to adapt pressure gauge stolen from forklift truck nearby…
Conclusion – you can only check if pressure switch is connected to the plug.
If somehow you have suitable gauge with suitable fittings – you can install it in the brake system between bulkhead and ABS brake fluid reservoir (UK version). The pump should switch off at 180bar and switch on at 140 bar during normal operation of the brake pedal (several strokes). Give or take 10bar... Pressure Gauge unions? To fit XJS brake unions??? You’re asking me are those metric or imperial????!!!! It depends. If you’re happy owner of the XJS example assembled during the weekend shift – you have a big chance of having both coupled together with brute force of Geoff from Coventry. Something that may help you identify those - attached below:

Chapter 3: Jaguar XJS Brake Accumulator Diagnose – data analysis

It’s time for the simple part, let’s review what we gathered so far and jump to conclusions:
-    Your overall time of loading from empty to 180bar = 100%
-    Time without pump slowing down = % of Brake Accumulator capacity loss
-    Time of accumulator pump topping-up = pressure increase from 140bar to 180bar
-    Time of load from empty to pump starting to slow down = faster load due to faster pump speed
-    Maximum pump rev loss = approx. 40% at the end of load cycle, losing the revs while pressure increases

Now, overall time minus time without compression would be too easy as the brake liquid flows faster without pressure from membrane and goes slower while the pressure increases, so the ultimate factor will be somewhere close to 0.7, so time running without pressure = 1 while the time pump slows down due to increasing pressure = 0.7 to make it flat and easy in terms of volume. So we need to find time were compression starts evidently and apply 1.0 to pre-compression time and 0.7 to compression time Then we can count reference of top-up time as the jump from 140bar to 18bar and calibrate our calculation. Then we can divide time while running with no compression by the overall time of pump action to get our theoretical percentage of Pressure Accumulator Sphere’s performance loss. Plus measurement uncertainty of 10%. I know, it sounds simple. To simplify even more we need to apply likelihood of issue occurrence for three main components of XJS brake accumulator...

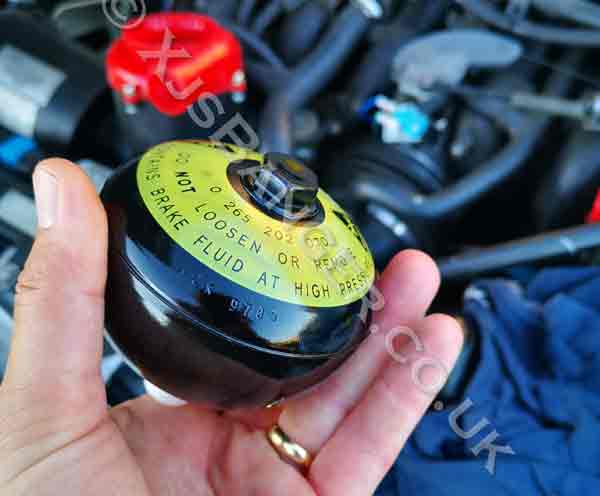
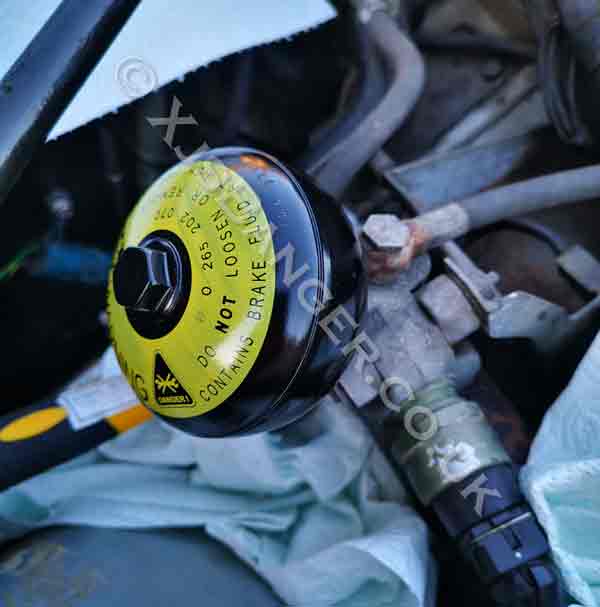
I was trying to describe a formula allowing calculation of approximate performance loss of each brake accumulator with data gathered with use of watch and your ears. After a while I realised that description above will be sufficient for those able to do it and will keep away those who can’t. For safety reasons – let’s keep it that way.

Conclusions:

3.1.    What’s most important: 
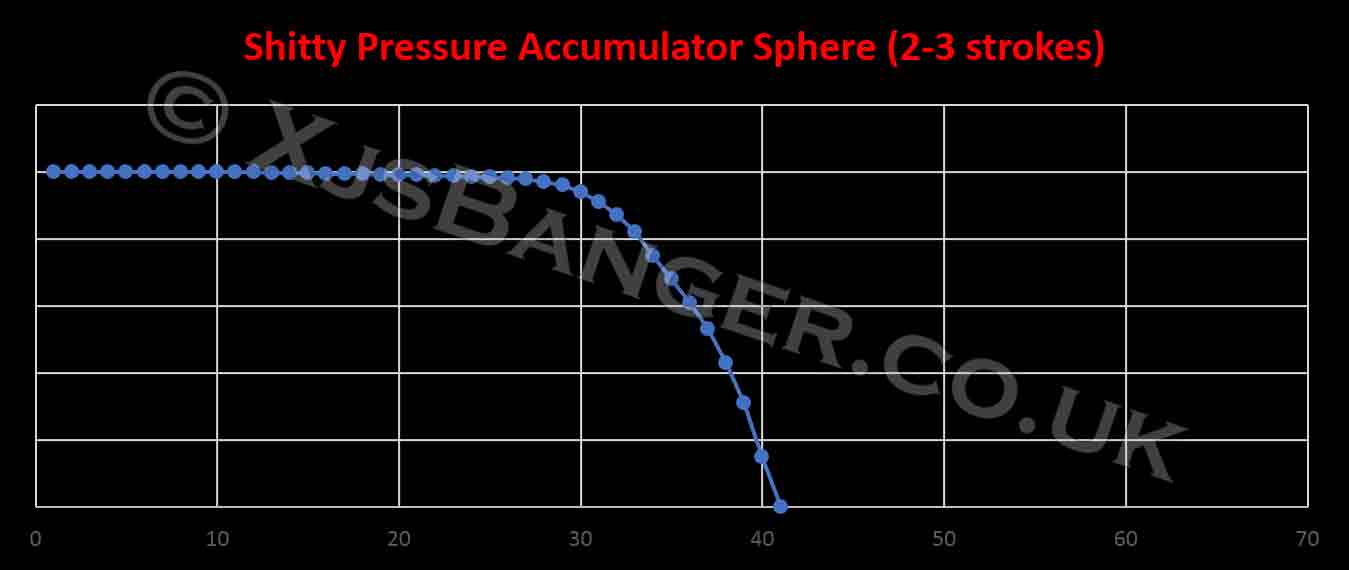
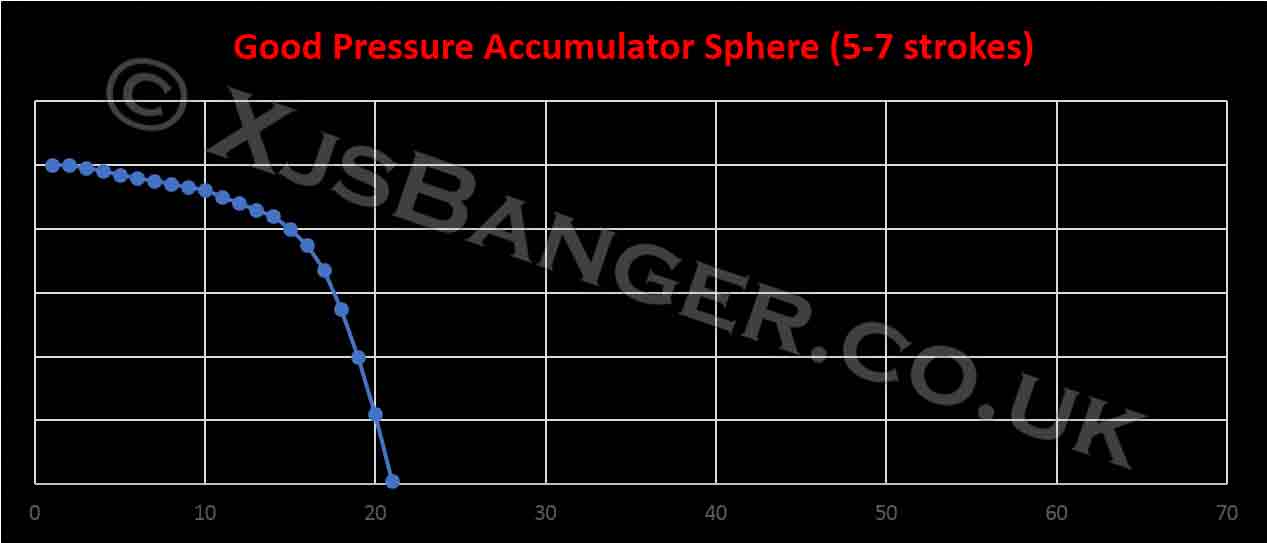
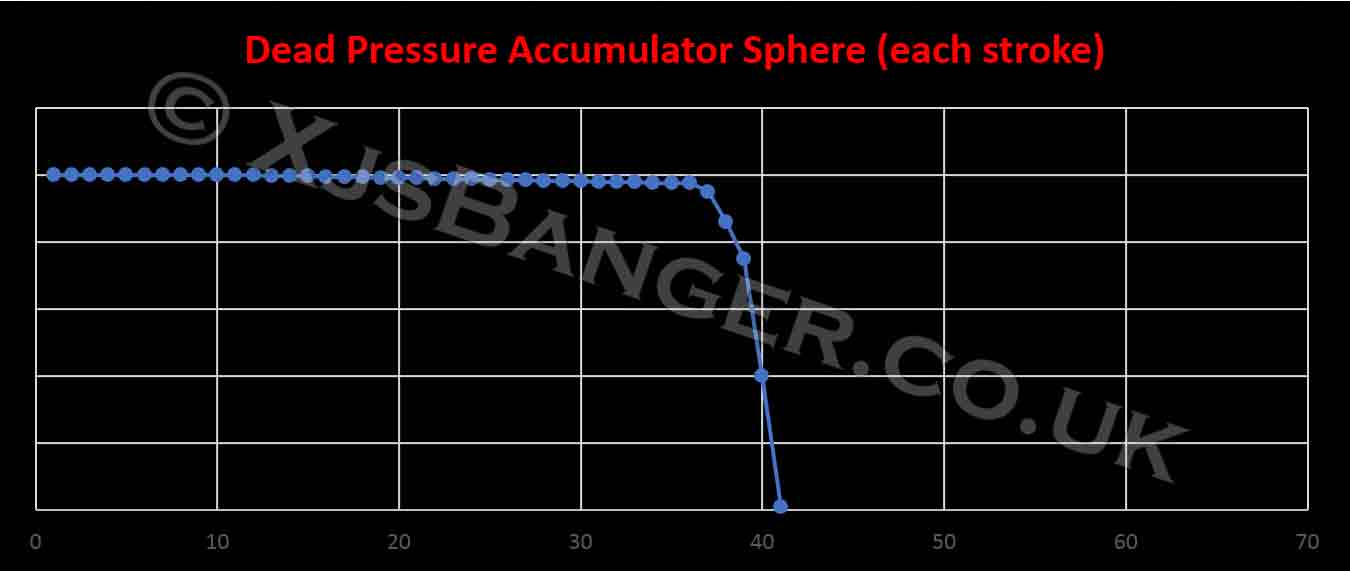
UNIFORM, CONSTANT DROP IN PUMP REVS EXPRESSED WITH SOUND “EEEEEIIIIIIUUUUUOOO” OVER ENTIRE TIME OF LOAD-FROM-EMPTY OPERATION (see graphs below)
3.2.    Overall pumping time doesn’t matter. Before you’ll start bullshit talk about overall pumping time – please remember that those pressure pumps were made for Leyland and installed in British cars. I can only imagine tolerances on those flying around on assembly with smile and “QC PASSED” stamps fuming from over-usage and abuse. You will get massive differences in time (required to load the accumulator sphere) between the cars due to the physics/tolerances involving eccentric operation of the pump.
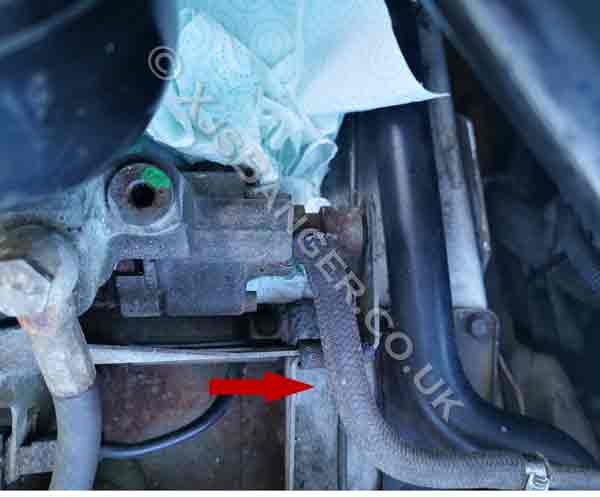
3.3.    Short top-up time (4-6s) confirms good condition of the sphere – as long as “unload test” goes well (see: “Diagnose Pressure Accumulator Sphere first”)
3.4.    If your Brake Accumulator pump kicks in after 3-4 strokes - performance of the whole assembly is very good. If you're making only two strokes - be prepared to have spare Pressure Accumulator Sphere and o-ring required for replacement.

3.5.    If something works - don't touch it with your salad fingers. If you are unable to control yourself - buy brand new sphere and keep it in your wardobe until your XJS will kindly ask you for the new one.

...What? You want it even more simplified?! No way. Can’t do it. Or maybe. See the graphs below:

X axis (for UK residents: horizontal length of the chart) = example time, don’t treat it as reference.
Y axis (for UK residents: vertical length of the chart) = example drop in pump revs (that can be assessed by your ears only I’m afraid…).

Chapter 4: Jaguar XJS Brake Accumulator Sphere Replecement - Dirty Tricks

Well done, you were able to read through the entire blabbing above. So here’s the bonus – how to replace your XJS Brake Accumulator Sphere – without the need of bleeding the entire bloody system in the end.
First and most important thing: if someone states that "it is better to disconnect the whole brake accumulator assembly and replace the sphere on the bench" - he or she suffers from post-apocalyptic trauma, has plenty of free time and feeling lonley or is too old to know anything about electric impact wrenches available on the market these days. The entire brake system bleeding operation - required after disassembling of brake accumulator unit is frustrating, time-consuming and often (if not always) must be repeated. So help yourself and invest £130 in decent 18v impact wrench. My sphere was impossible to undo by hand. It took only 3 clicks with impact wrench to loosen it...
Second thing: if you're having brake accumulator with banjo bolt and rubber high pressure hose - SKIP steps: 4.3, 4.4, 4.8, 4.9 - this type makes operation much easier - sometimes without drop of brake liquid spill.

Replacing XJS's brake accumulator sphere is easy, what's not easy is to get the new one, which is branded or good quality. As per today, there is an extremely "good" offer across the Internet for any single wanker willing to spend approx £260-£350 for chinese reproduction of what use to be made by AC Delco (cheaper).

While Chinese version doesn't have to be worst, I was looking for cheaper substitute and I found Bosch 0265202070. It's absolutely perfect, I bought brand new product.... FROM AMAZON! Yes! with Amazon Prime next day delivery for £91.80 - awesome. It's slightly smaller in capacity and will give you 4-5 strokes before switching on te accumulator pump. Most important - it's Bosch, not no-name reproduction. If it's being used in Mercedes/Maybach - it should be sufficient for old XJS banger. It has M14 thread and it comes with o-ring pre-assembled.  I also found bigger-in-volume equivalent, which can be re-gassed, however due to weight - must be assembled remotely with high pressure hose - hence not mentioned.


Let's go back to replacement sequence:


4.1.   Unload your Brake Accumulator completely by pushing the brake pedal (with ignition off) 50-4000 times (Chapter 2, pt.1)4.2.   Top-up your ABS brake reservoir flush with the bottom part of the threaded neck. Wollbe out any air bubbles left. Close it.
4.3.   Get your XJS on the car ramps to make front as high as possible. Alternatively – lift it and leave on axle stands (skip that if you're able to swap accumulator's sphere within 5minutes)

4.4.   Get low pressure hose clamped 1-2 inches from the Brake Accumulator Elbow. Clamp on the hose gently – don’t damage it.

4.5.   Jam the assembly of the brake accumulator against the strut brace or anything available (use your imagination, crowbar, locking pliers etc). Remember to Jam it to provide lock in counter-clockwise direction of accumulator sphere unscrewing (not required if using impact wrench)

4.6.   Unbolt your Brake Accumulator Sphere (also known as hydraulic pressure accumulator) - use
IMPACT WRENCH, no need to clamp it, just hold assembly with your hand.
4.7.   Screw in new brake accumulator sphere – only 1-2turns on the thread so it can barely hold in the housing. Remember, 1.5mm thick oring should be already present on your sphere. 

4.8.   Undo the clamp from lower pressure hose (pt.4)

4.9.   Wait until liquid starts to flow out from the threads of brake accumulator sphere loosely installed in the accumulator housing

4.10.   Screw the brake accumulator sphere all way in, tighten with one hand only

4.11.   Switch on the ignition and wait until brake accumulator is fully loaded (usually up to 60 seconds)

4.12.   Lower your car, suck out excess brake liquid from reservoir (with accumulator loaded) and take it for a test drive.


Now it’s time to answer all the wanky questions why this method is not referred in any workshop manual, in a chavy way:


“it’s a fokin’ critical pressure system bro! You can’t put the reference to clamp tha fokin’ rubber brake hose bro! They couldn’t put that in tha book bro! That would be an abuse of critical safety system in their heap bro! Same as hangin’ tha brake calliper by tha hose, bro.” (these days known as PFMEA).

Share by: