Jaguar XJS Radius Arm Separator Tool

Jaguar XJS Trailing Arm DIY Separator Tool

You probably heard plenty of legends about large control arm bush and fusion with chassis made with widely available substance – rust. Most of those stories are unfortunately true. When two cousins get married and have a child, the child is an example of successful Jaguar design – not limited to XJS model only.

Probably, you wonder why all those Jaguar rear subframe assemblies on eBay are having radius arms sliced in a half with angle grinder. That’s right – slightly difficult to detach from the chassis cups, even by the breakers.


Why to perform this on your shiny, rubbed and ejaculated The-Jag XJS model? Simon Templar won’t tell you, he’s dead. Same as your Jaguar will be if the chassis cups will rot-through. Feel yourself officially warned. It's all about prevention.

Jaguar XJS: Making Trailing Arm Separator - Raw Material


You will find plenty of guides how to remove Jaguar’s radius trailing arms – in destructive way. You may be even lucky enough to find few tips how to remove these without cutting, grinding and bending anything.

One of the tools recommended for this job is a piece of metal called “heel and toe” pry bar, also known as “rolling head” pry bar:

rolling head bar

Heel and Toe pry bar set, you can get it for £11.99 Best friend of every Jaguar XJS breaker.

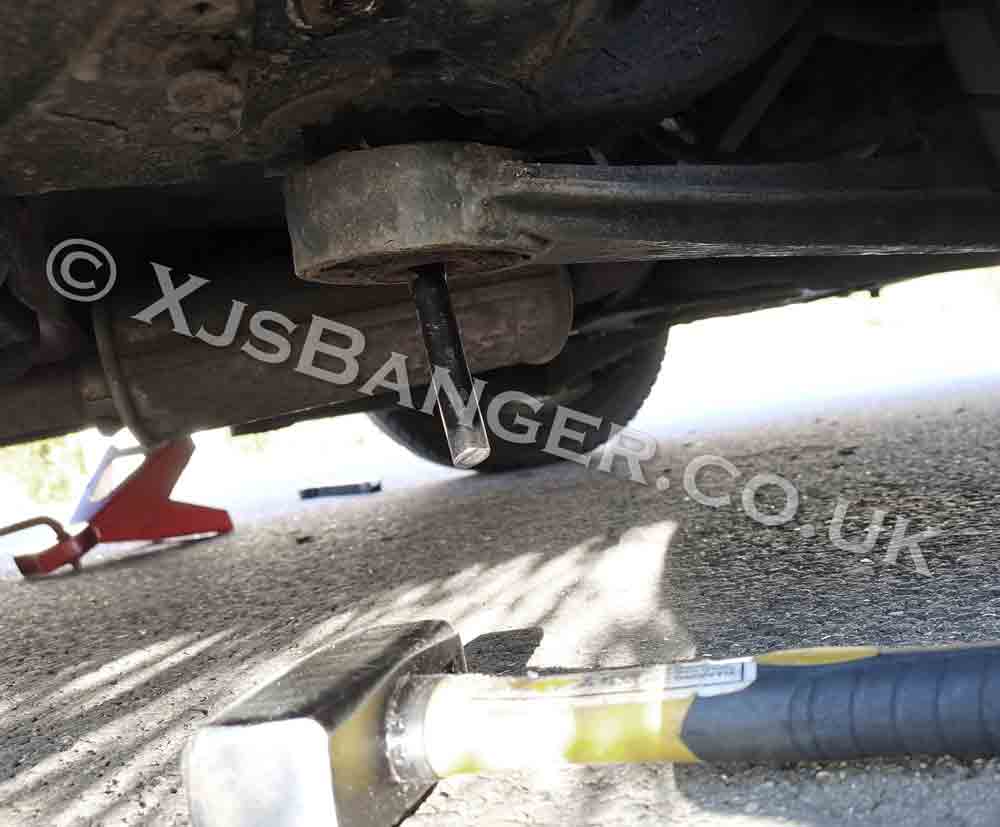
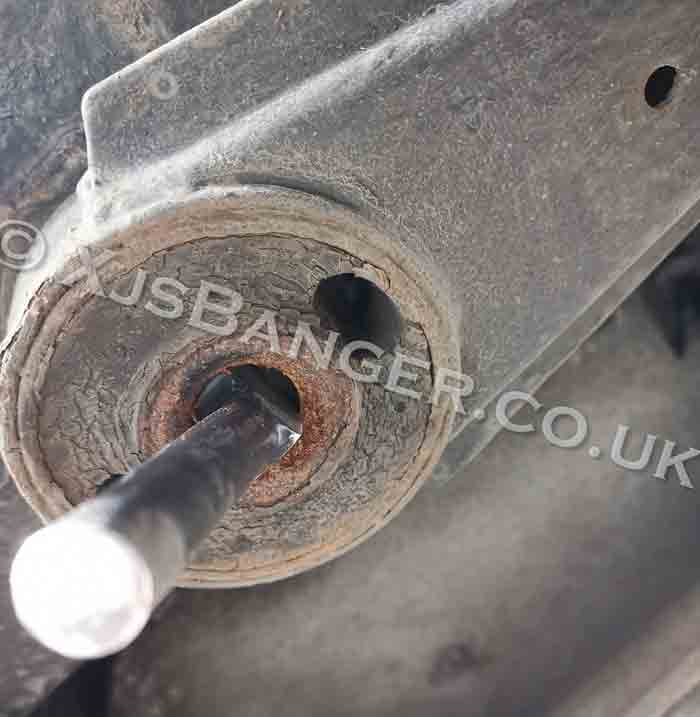
It looks like giant can-opener and was one of the favourite suspension-checking tools of every MOT tester in UK. Until someone died.


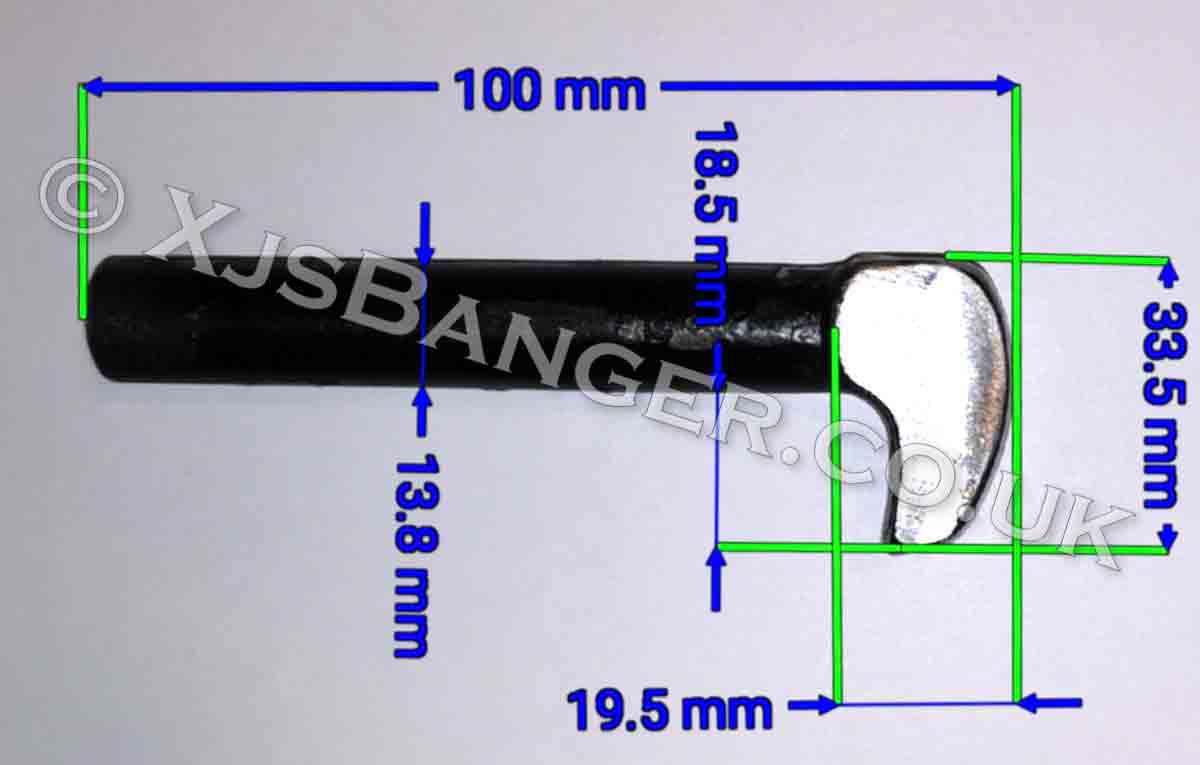
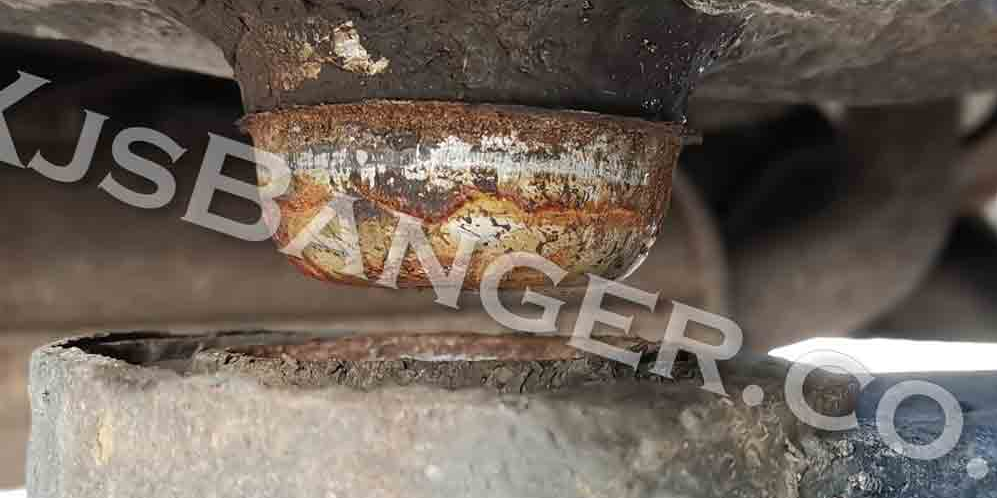
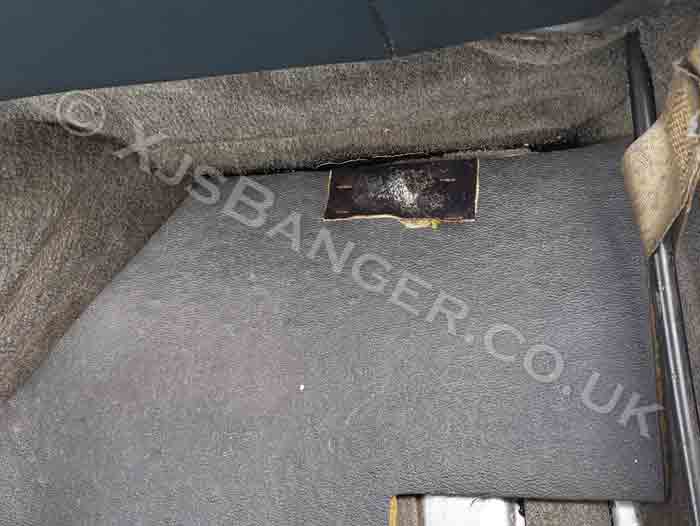
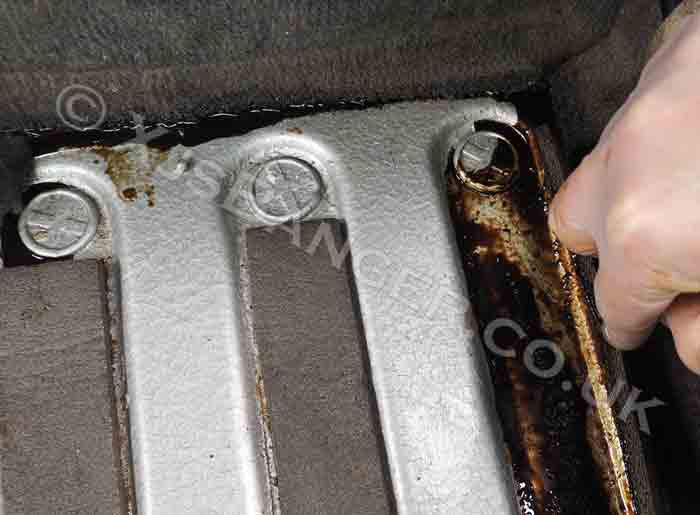
This tool is extremely effective… But not in the shape and form as per photo above. There are plenty of manufacturers, plenty of size variations. It will take some effort to adopt it, to perfectly fit for purpose, to fit your beloved Jaguar rotbox. You have however, all the help required in this article.

The brand of this set is self-explanatory. I must admit that the value-for-money factor is great! These are even made from some sort of carbon steel, not sure if heat treated... 


Remember, the stake is £11.99, you have only one chance, don't mess it up you your wife will need to find even cheaper hairdresser....


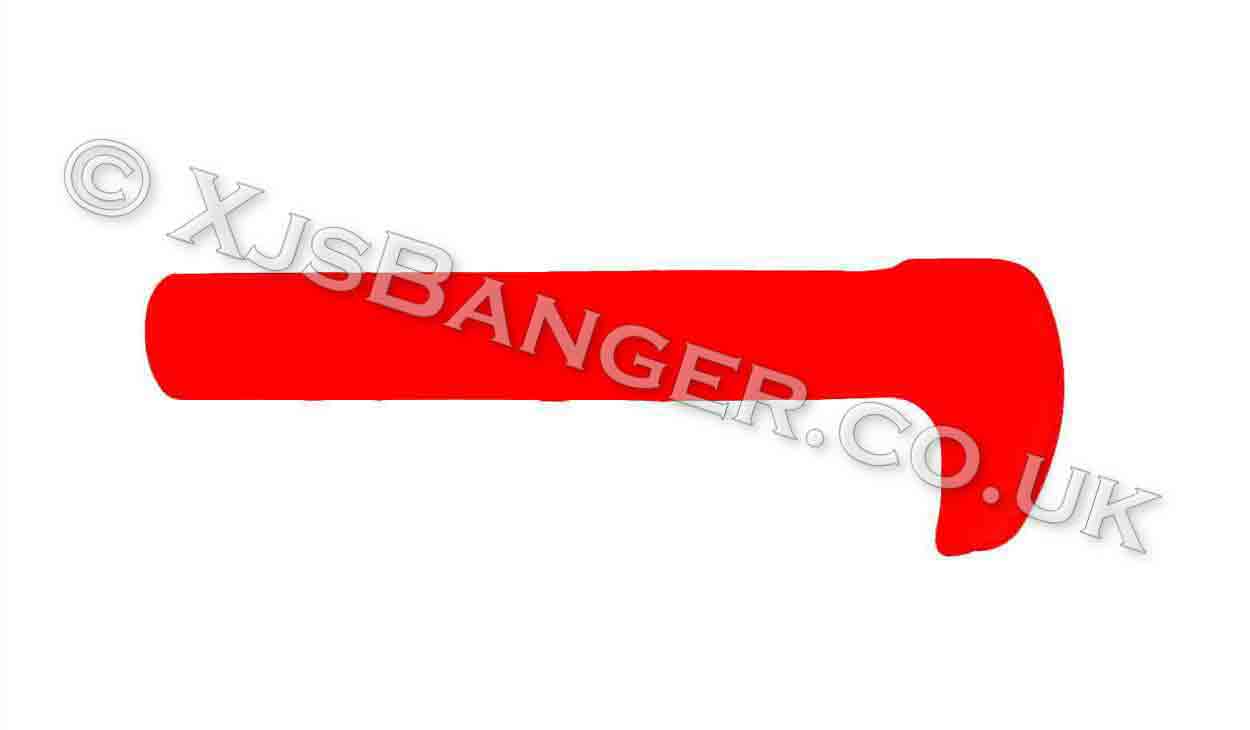
Use a contour template below - you don't need to print it, just save it on your desktop and use ZOOM function so you can match it with workpiedeon the screen. Then, place a plain a4 sheet of paper on the screen and draw your contours. Alternatively - ask your grandson to print it.

Jaguar XJS: Making Trailing Arm Separator Tool – Pocket Edition!


That’s right, this tool is tiny, it is cheap. Most important – it allows you to separate trailing arms without lifting your XJS:

Jaguar radius arm separator tool

The tool above will work on every Jaguar equipped with radius arms also known as trailing arms. As British automotive industry used the same radius arm bushes for Jaguars, tractors and Aston Martins – this tool is a must-have for anyone having questioned pleasure to work with these cars.


Let’s get back to the tool itself:


Material: nothing else than 400mm Heel and Toe pry bar. Dimensions between manufacturers will slightly vary, however you will be always in sweet spot when choosing cheapest one - as per photo.


First thing to do – slice off the back of the head almost flush with the handle, try to create smooth round corners to look like a pro while using it. It will also look nice in your pocket while stopped/searched by Police.


How to make Jaguar trailing arm separator tool

Believe it or not but bigger, better Dremel - Bosch GRO 12v is the best tool for this task.


Have a look at the photos below. Now cut the nose to achieve specified dimensions. Smooth and round all the sharp edges. This will allow to use minimum force and avoid any damage while trying to detach large radius arm bushes from the body mounting cups, length of the shank is your preference. I went for 100mm as most compact ad allowing to whack it easily without spring back effect.


Job done. Now the time has come – the greatest test of your pocket radius arm separator tool. Grab a hammer and apply 2-3 blows with light force. No more crap hovering around the Internet forums, no hassle.

Your Radius Arm will detach in controlled way, it won't crush your hand, it won't make rear axle rolling away, it won't misplace - this is all freaky crap from XJS cultists.

Jaguar XJS Radius Arms - Rustproofing


After only-successful-test of your trailing arm separator – it is worth performing necessary rustproofing of both XJS chassis mounting cups. If your cups are still the of course. Regardless of radius arm’s busing condition – spray few layers of white lithium grease on the cups and inside the bushing – aim for steel elements only and remove any grease from the rubber parts. Lithium grease and rubber don’t like each other. Let it dry and assemble even if looks messy. Attach radius arm safety bracket. Use a lot of copper grease on every bolt and bolt hole, wipe the excess of and add locking wire.

To achieve an ultimate protection – spray entire area all around with Bilt Hamber Dynax S50 until white grease will be no longer visible. Adding some copper grease on top is a slight overdose, but hey - it's still better than managing Carbon Footprint or Greenwashing...

There is only one thing left to do and virtually will require no effort or brainstorming at all. The bolt holes design to hold the radius arm’s securing brackets – are going straight into cavities created by welded elements. Use them!

If somehow - you’re forgetting that XJS family is rotting inside-out – these holes can be used to rustproof the places not seen by human eye since chassis assembly (sometimes visible but hard to identify – on the way out from XJS crusher/compactor). Again, Dynax S50 or Dinitrol will do. Just slide the spray probe in and empty the can – yes, ENTIRE can, while swinging with it in 360 degrees of freedom. If the chassis of your Jag is still sound – nothing will drip out on the ground below.

As you can see on the photos above – nothing dripped down on the driveway.  Just imagine all those rusty sections covered in nicely smeared, greasy, sticky rustproofing compound... Nothing better could happen to your XJS's box sections...

I said it won't “drip down”, I haven't promised anything in relation to “spill inside” outcome. Even so, this condition and originating rusting resistance is actually highly sought after – unless you’re one of those psychos having carpets in the bathroom… With rear wheels jacked up as above, your Jag will also receive free rustproofing of the seat mounts and front footwell. I was wondering where all that sprayed stuff went...

Well done, you’ve just prepared your XJS for unplanned rear IRS removal or massive rust attack.


Share by: