Jaguar XJS Rear Quarter Glass Removal

Jaguar XJS Rear Quarter Glass Removal

So, you’re here interested how difficult is the task from the subject. Not difficult at all. Removing and reinstalling rear quarter glass of XJS is easy and should take no longer than 4 hours with full chilling, few beers accompanied with cigarettes or whatever you prefer.
Most troubling and time-consuming is are the life form you will find under the rubber seal and chrome trim. You may be lucky to see perfectly preserved paint, however be prepared to have pool drain pump and MIG welder in your pocket.


Items required (to remove it, not to fix it):
-    Blind CLOSED cup copper rivets 3mm diameter, 6 and 8mm long
-    Red grease
-    Telescopic inspection mirror
-    Paracord
-    Amazon gift card (or any other)
-    Plastic pry bars (body trim removal set)
-    Tube of Visbella silicone gasket maker
-    Hylomar Blue non-setting silicone


Here’s the plan of action – don’t count that I’ll give you the photo of every single thing that must be removed/reinstalled, sequence matters:
a.    Strip the interior bits blocking the way
b.    Remove the triangle chrome element masking two chrome strips in the rear area of the car (access from the boot). There is only one nut to undo – if your IQ is below 75 – certainly it will snap and come out in pieces. Use Liquid Wrench and go slowly with your socket tiny steps forward and backward – without forcing it.
c.    Use Amazon gift cards to flip the bottom section of the rubber seal over the lower chrome finisher
d.    Remove the glass with rubber seal.
e.    Remove post cover plate (drill out rivets)
f.    Remove rear vent panel (drill out rivets)
g.    Remove the lower chrome finisher (drill out rivets – if any still present)
h.    Remove the nasty ginger shit and other excrements including flaking paint
i.    Fix the rotten areas
j.    Etch everything with phosphoric acid
k.    Prime/Paint
l.    Apply silicone gasket maker on the sealing areas
m.    Smear everything with red grease
n.    Separate glass from the seal
o.    Clean the rubber seal
p.    Apply Hylomar into the glass groove (rubber seal)
q.    Install the glass in the rubber seal
r.    Smear the rubber seal with red grease
s.    Smear the whole area with red grease
t.    Reinstall lower chrome finisher (blind CLOSED copper rivets)
u.    Reinstall rear vent panel (blind CLOSED copper rivets)
v.    Reinstall post cover plate (blind CLOSED copper rivets)
w.    Smear everything again with red grease (half-inch thick layer)
x.    Reinstall the glass with seal
y.    Reinstall everything else
z.    Do the same on the other rear quarter glass.

1. Interior Trims


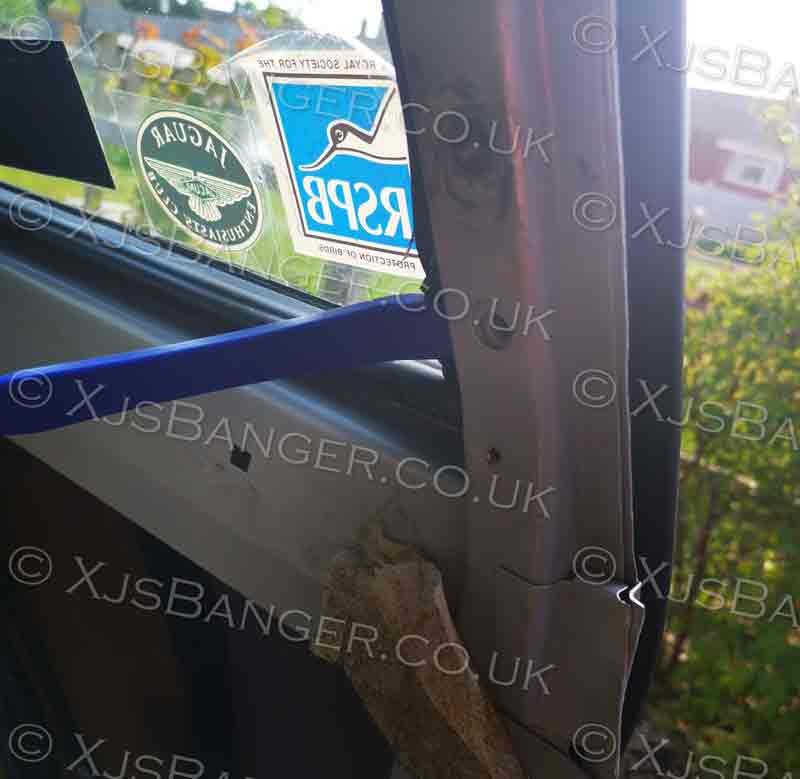
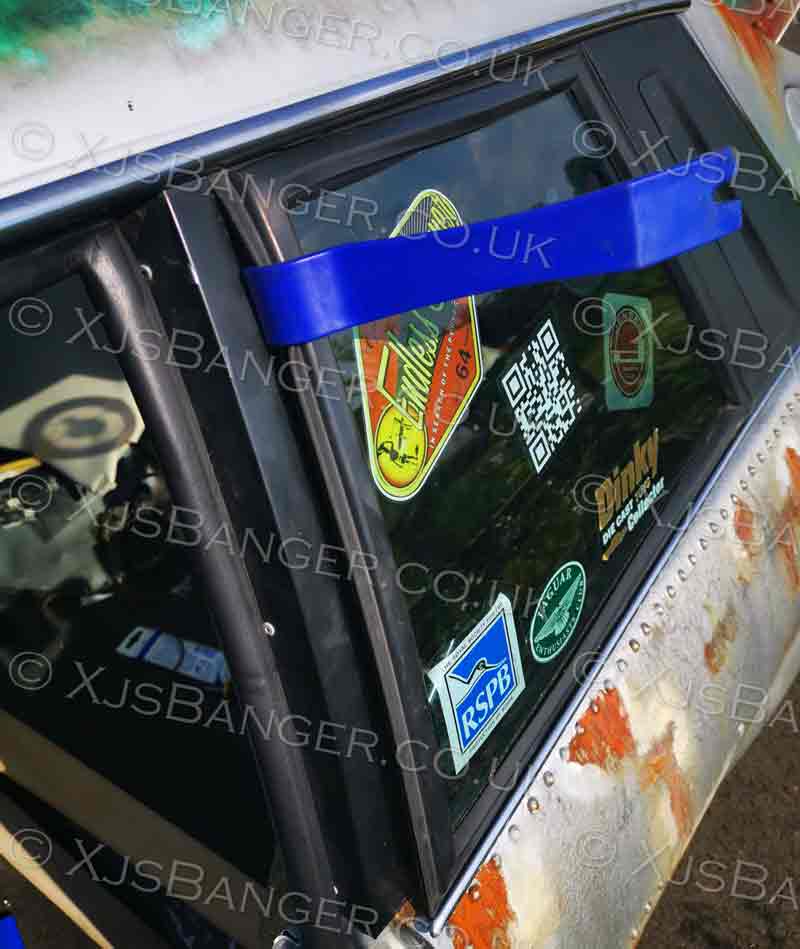
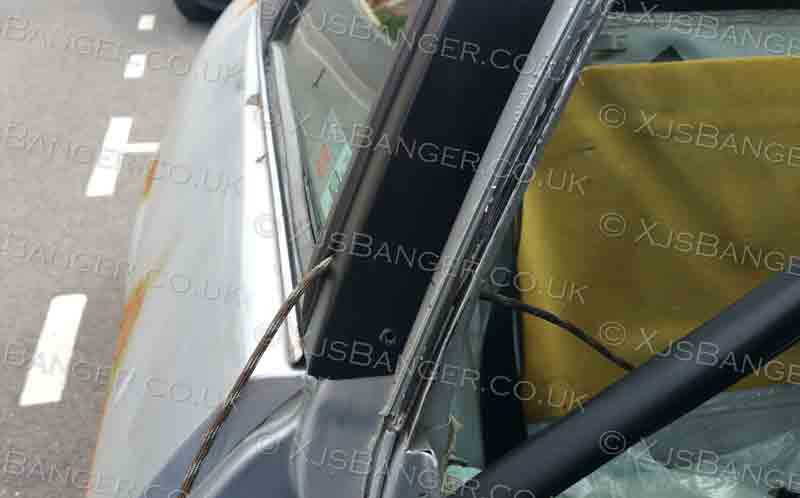
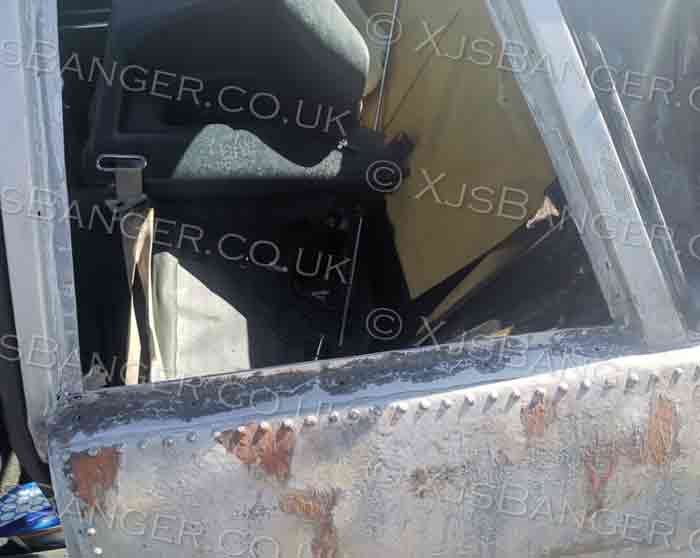
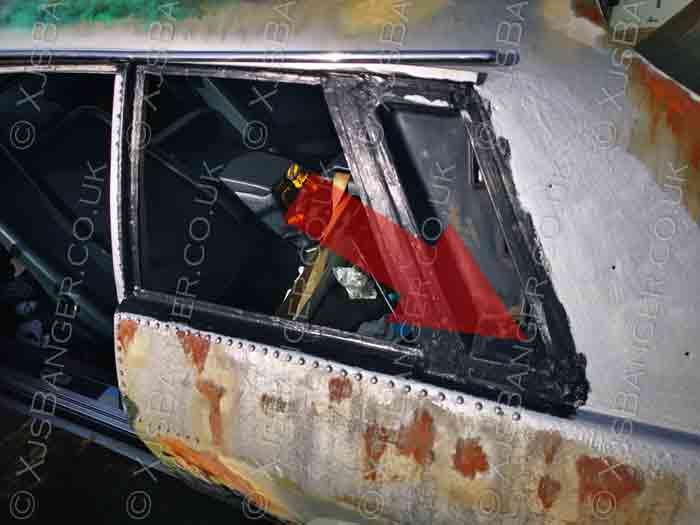
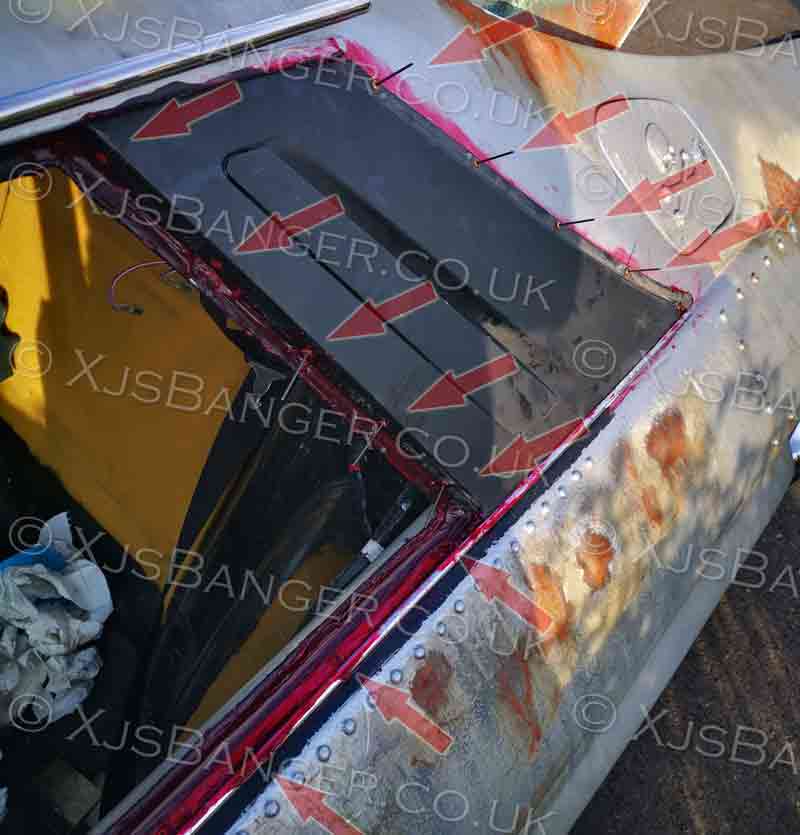
Start from removing all interior trims around the quarter glass. You will need to remove fluffy liner from the lower section of the post, right next to the door seal. 

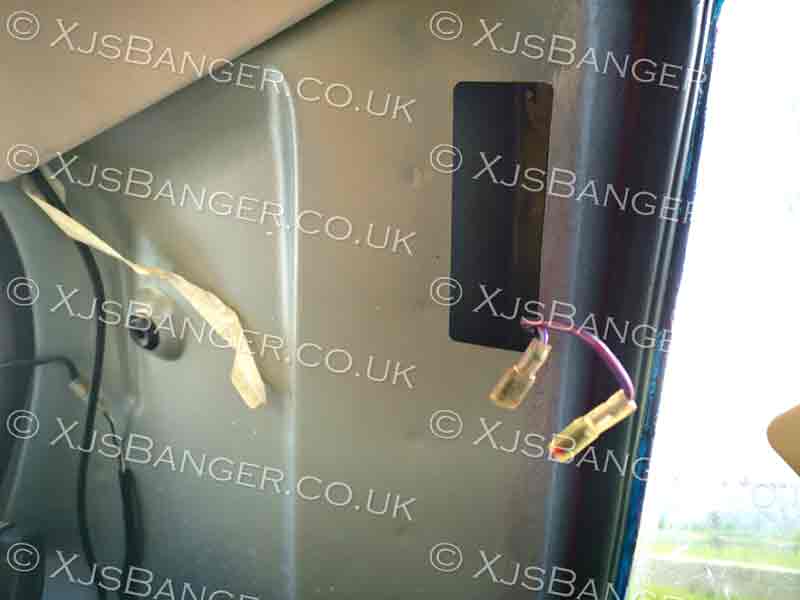
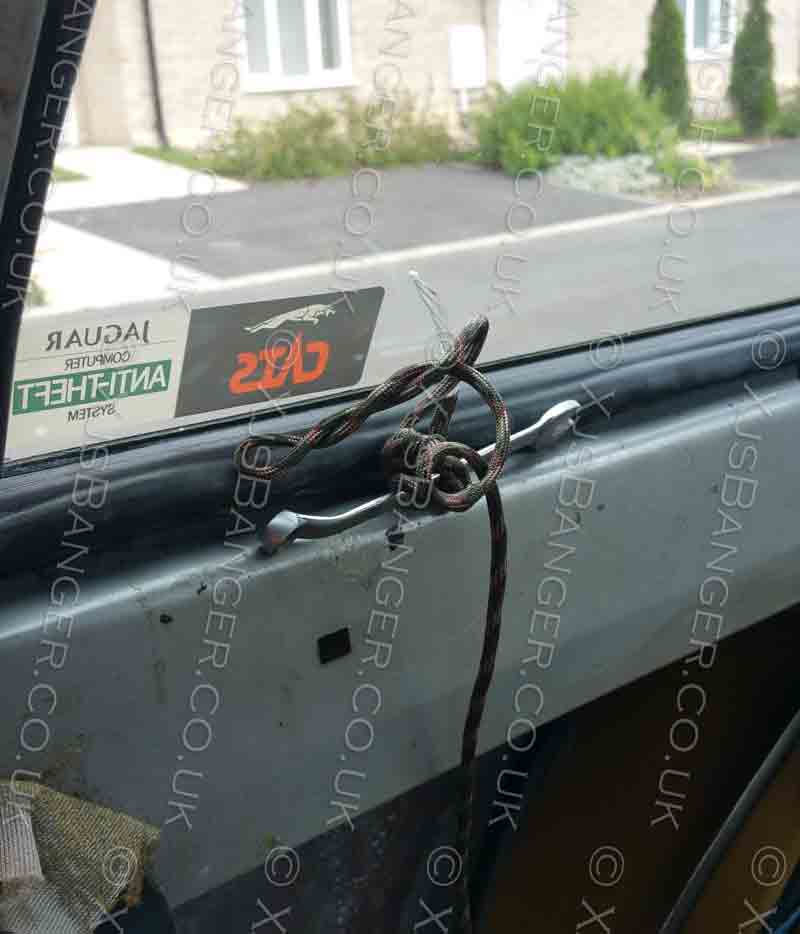
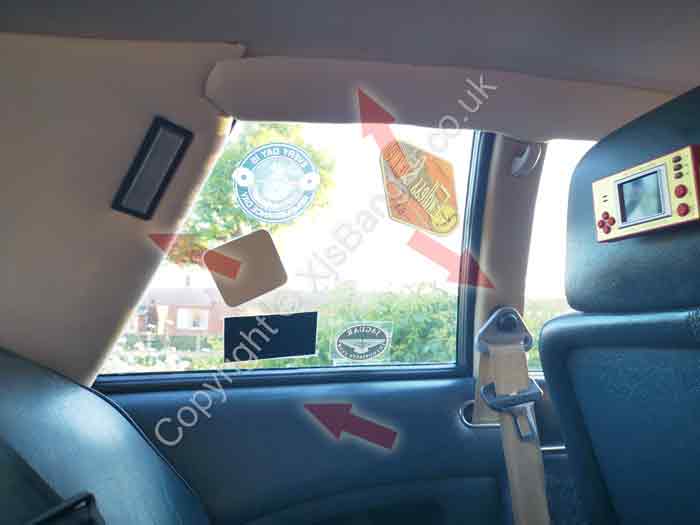
Use a guitar pick or similar rubbish to open the cap on the hanger and unscrew it, remove plastic cap from the seat belt clamp and unbolt it. Now you can remove internal post trim. Pull out the headliner’s strip located along the side of the cabin, just don’t break it. Remove the Rear sofa completely. Remove rear trim with interior lamp. Remove the trim with the rear speaker. Now it’s ready for the inspection. 

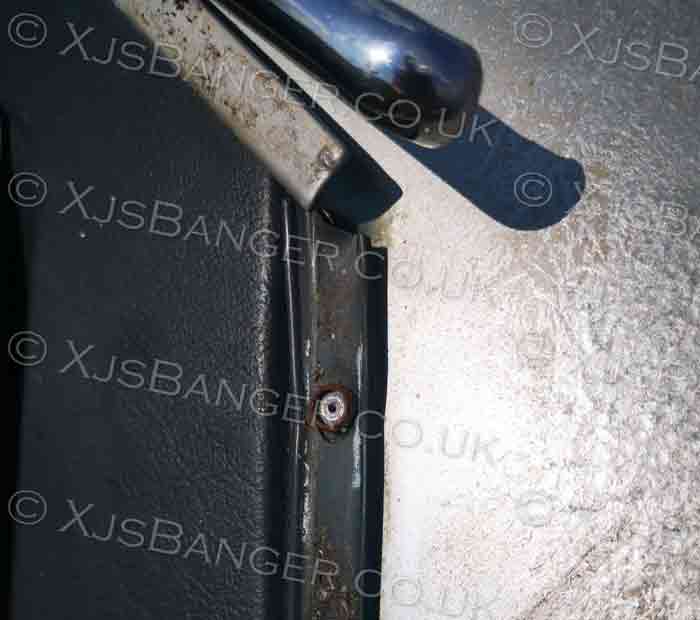
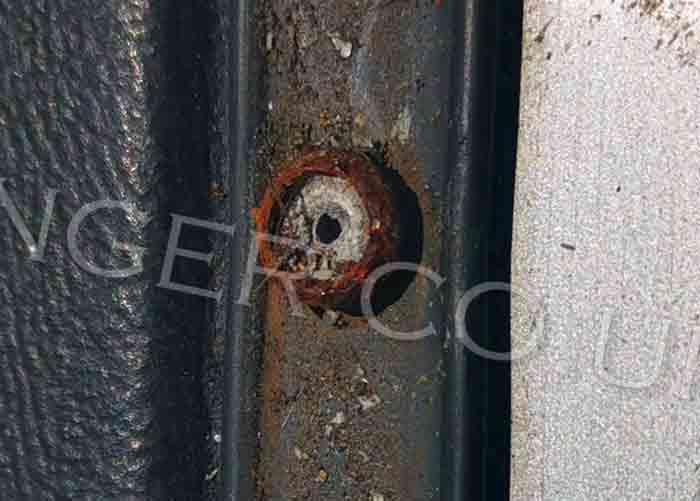
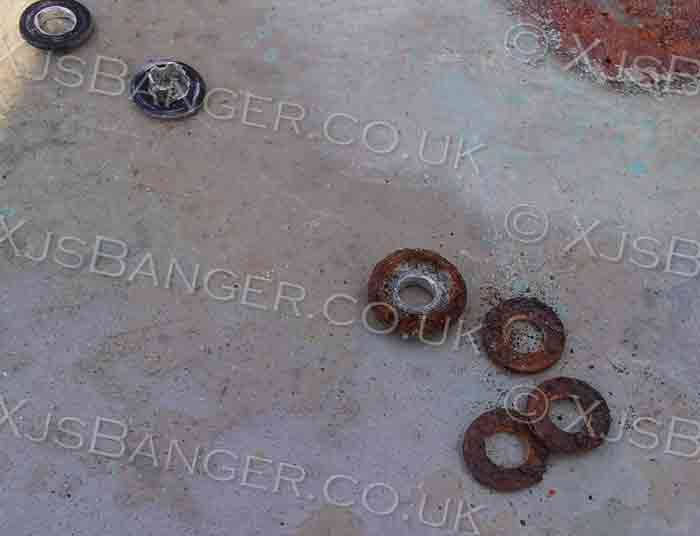
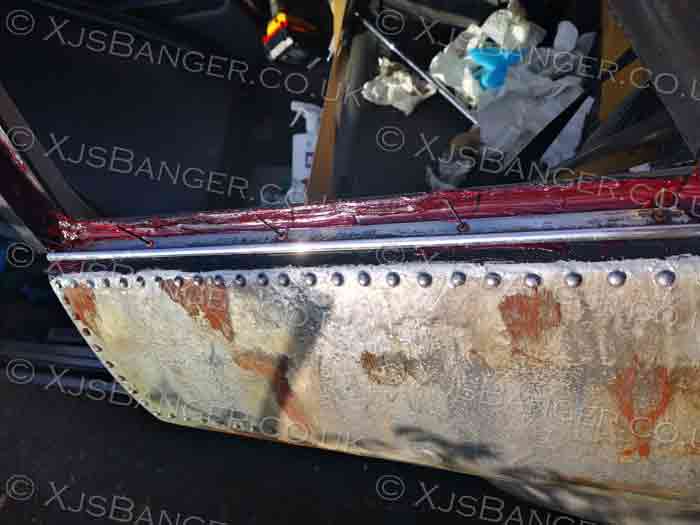
Measure all the rusty screws and replace those with stainless (or at least plan to do it) – eBay is nationally recognised help for XJS owners… 


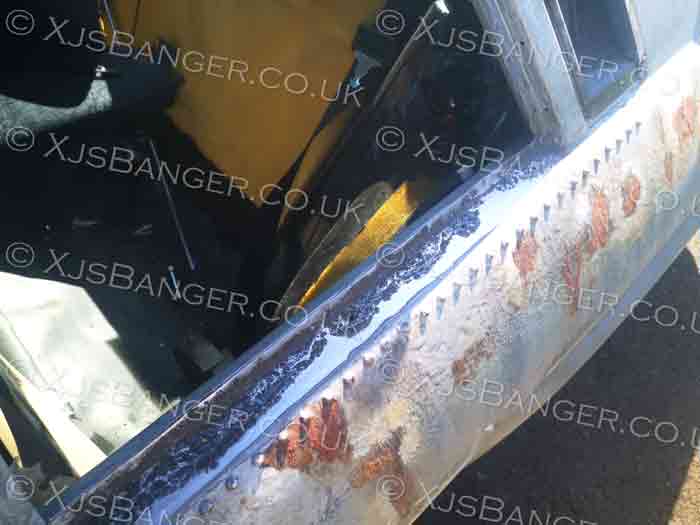
If you are unable to strip anything from inside - STOP. Just stop and follow THIS link.


2. Jaguar XJS Electrical Fray


While you are here – have a look at the interior lamp cables coming out from rear post. Those should have cuts on the insulation already. Coventry style of assembly can be cured with rubber edge protective trim (see XJS ToolBox section for details) and installation of this tiny strip will benefit in the future. Unfortunately – whole XJS electricals were assembled in similar way. Inspect all the wires in this area, as those may be sliced/frayed since new – due to “can’t be bothered” assembly. You will also discover lots of rubbish pushed in every cavity / under the rear sofa. This practise was born in UK, left without action and not penalised. 


Similar actions are taking places on new housing development sites, where all the shit is being buried in the garden of a happy owner, or worst – in the bathrooms and kitchens of highly priced new built properties. Consider it national standard.

3. Inspection under rear quarter glass.

Grab telescopic inspection mirror and look under the quarter glass from inside. You can use your mobile phone's camera to perform this as an alternative. Lucky scenario – you will see blind rivets still in place in the top internal section below the glass. Unlucky scenario – you will see rubber gasket of the quarter glass. 


Most possible scenario – you will see the sunlight and feel the movement of the air. If so - congratulations, you have found firts water loading area in your XJS. Twelve more to go. 


4.    XJS Rear quarter glass removal

It’s time to remove your quarter glass. Forget about all the rubbish information gathered across the Internet. Your quarter glass will go out easily if you will do it correctly. Unless someone was there before you, done really shitty job with use what was available in Co-Op across the street. That includes superglue and toilet roll.
Now you have two options:

Option 1
Start with this one, if things go bad – use Option 2.  Insert plastic pry bars from outside and inside approx. 1 inch above lower corner of the glass closest to the door. Jam the pry bar between the rubber seal and the frame, there is no need to forcing it too deep, slide amazon gift card or anything similar – to create a gap for your plastic pry bar. Push both pry bars deeper, apply the pressure on aforementioned area of the quarter glass from inside (corner, try to push the seal, and support your palm on the glass) – you should be able to see it moving. Force-slide both pry bars up (to the upper corner) and pust from inside. There will be deflection visible from outside. The seal has double lip on internal side: top one covers the lip holding the glass in place. Firmly and with pry action of your internally places pry bar – push the corner out. Apply and hold the pressure constantly with your palm, try to flip the sealing lip outside. Once the corner is out – apply pressure of your palm from inside and pull from outside – it should go smoothly. REMEMBER that rubber seal will hold against lower chrome finisher - flip the seal over it if you're quarter glass goes out in the lower corner There is a chance that nothing will even move. That’s because former owner tried and failed to prevent your XJS beauty being a water bucket. Probably the entire quarter glass is stuffed with windscreen bonding agent or other thing meant to create a good seal… If nothing helps – it’s time for…

Option 2.
Similar to the first one, only one thing added – paracords. Start from smearing your paracord in red grease, go inside and stuff some red grease in every corner of the rubber seal – under the top lip (the first one covering the sealing lip) now insert greasy paracord under the first lip of the seal. Wrap both ends on something allowing spin-compression (as per photo). Wind it up until paracord will deflect the top lip almost perpendicularly to the glass surface.  Spray the area with WD40 degreaser, then WD40 itself. Perform all the things as per Option 1. Create a tiny gap between rubber seal and metal frame. Insert greased paracord through it. Now move it forward and backward with a saw-action trying to travel along the rubber seal (separating rubber seal from gluish thing holding it in place. Try to do as much as possible of the seal's circumference.   If you’re working alone – apply two long strips of gorilla tape between the roof and the glass to avoid unplanned glass ejection (outside you dummy).
Another alternative approach requires small hook tool - wrap the paracord around the seal as mentioned above and tie both ends together with simple know and tension achievable with your hands only. Create a gap in one corner and insert a small hook tool to grab the paracord (tied around the sealing lip) from outside. Now pull - the sealing lip should easily flip outside and remove the glass while you're pulling the paracord loop.
5.    Stripping the outside panels.

When your quarter glass is out in one piece and you may think that worst part is behind you – it is time to assess how much metal is left under the lower chrome finisher – to do it – pull the finisher strip – if all the rivets are still in place – that’s the best omen you can have. Probably – it will come off without any force applied.
Start from drilling out the rivets, then move on to rear vent panel (or whatever this thing is called) and remove shortest chrome finisher by prying it (plastic pry bar).
You will see 4 rivets with some sort of only-available-in-80s clips on top  - DON’T drill the cup on top, just the blind rivet inside. There is a number of washers under each riveted cup – write the numbers down correctly as those are different on each XJS. Grab all the cups, all the separated washers and drop those into the cup with phosphoric acid to remove corrosion and bits of aluminium rivets jammed inside.
Remove the vent panel and drill the last remaining rivet on bottom chrome finisher – actually there is a high chance that it was never drilled, same as the double side adhesive tape was never peeled-off… Inspect the small star clips on the inner part of the vent panel - if excessievely corroded - replace now and avoid flying-off parts during the ride.
Now it’s time to remove B post metal panel, don’t forget to protect/remove your door seal. Speaking of protection, if you were not bothered to cover your front seats, you’re probably feeling like an absolute wanker now – and yes, metal swarf will cut the leather eventually.

6.    Assess the workload.

Now with everything removed – try to find some metal – especially in the lower section of your quarter glass frame… Grab angle grinder with cup wire brush and strip all the corroded/bubbled areas from the paint. The bottom section of quarter glass frame must be wire-stripped completely – if it’s rotten through – don’t waste your time and effort – it’s an easy fix with MIG (cut/replace the whole section with metal strip). Some huge corroded areas may be easy to rework, while small bubbles are often serious rot-through disaster. Gently clean every removed component, spray with Bilt Hamber from inside – even if made from non-ferrous metal.
7.    Rework

Remove any remining glue, silicone etc. Wipe everything with WD40 Degreaser. Brush the whole area with phosphoric acid - including remaining paint. Don’t let the acid dry out, avoid sun exposure, re-brush with acid multiple times with 10-30 minutes interval. Alternatively - create acid pool in bottom area: roll a cord from "QuckSteel" kneadable putty and apply on the edges, plug the rivet holes and pour with acid (best solution). Pickle for at least 2 hours - it should go shiny in crroded areas. Remove the acid, remove the putty-made collar, clean the rest with cloth sprayed with WD40 Degreaser. Rub it with sandpaper again – including remaining paint and degrease one more time. Apply 3-5 layers of POR15 with a brush (NOT spray), there is no better product on the market (use Hammerite only in the areas with easy access - it’s getting bigger rubbish with every year of production). Let it dry overnight. Degrease next day and apply thick layer of Visbella gasket silicone maker over the metal window frame (both sides of the metal profile creating a seal with the rubber seal) Shape it flat when it starts to settle with wet finger. Now move to the plastic frame under the vent panel – look at the area marked with red arrow (picture below). Dig out (if the blob is still there) old hard-as-rock adhesive used to make it water-tight. Someone who applied it originally – probably was doing it with one hand, while rolling cigarette and smoking it up. Clean, degrease and fill the gap with Visbella again, shape it with your finger to allow water draining down (if you cannot imagine this it means you’re a banker and your IQ is too high for this task). Let it dry – THEN proceed to point 8.
8.    Reassembly

CRITICAL REQUIREMENT - change your clothes and put on something as close to the bright white colour as possible.

Spray entire area of bodywork (all covered areas) with Bilt Hamber Dynax S50 (spray detached panels form inside if not done already), let it dry. Rub the mating areas of bodywork with red grease. Reassemble the B post cover. USE ONLY bling CLOSED copper rivets. CLOSED – means that the rivet shank is not going through it all the way. The endo of rivet is fully closed after rivet shank snaps-off. Stuff plenty of red grease around the rivet holes. Hold the cover in place with loosely inserted rivets. Then take out each one of them and dip in red grease, load into the rivet gun, push hard against the surface and squeeze half-way, then release the pressure and squeeze until it snaps. This way you will avoid destroying the whole workload with the rivet gun’s head scratching everything. Repeat with every rivet, use loads of red grease.
Now it’s time for lower chrome finisher. Same rules as with B post cover. Use loads of grease under the finisher (see photos below).
Last thing remaining is the rear vent panel. Pull out the cup fasteners and washers from phosphoric acid – use magnetic pickup tool. Clean with WD40 Degreaser and cover in your beloved red grease. Do your maths with the washers, use 4 longer rivets in the area where the chrome strip clips were installed – 8-12mm is a sweet spot. Put everything back on the rivet and make sure that rivet head goes into the cup – if not – use your drill to grind it off to allow fitment. Don’t forget to dip each rivet in red grease prior to fitment. The rubber strip is old and will fit on top of the cup clips with little of stretch. Now install the chrome strip and triangle joiner (use red grease). All done, you’re ready to reinstall the quarter glass.

9.    XJS Rear Quarter Glass Reassembly

Time to stuff some Hylomar Blue between the glass and rubber seal: remove the glass – clean the seal with WD40 Degreaser, let it dry. Stuff a thick bead of Hylomar Blue in the glass gap (rubber seal), be aware this thing is messy. Install the glass and wipe the excess of Hylomar that you’ve just squeezed out. Without coffee break –fill the outer lip of the rubber seal (glass already assembled) with guess-what-colour grease. Don’t fill the wrong lip – you want to fill the one that seals, not the one that serves as an esthetical cover), apply fat layer of red grease around mating surfaces on the bodywork. Now grab the paracord already smeared with red grease and stuff it in the lip already filled with red grease and line up both ends with sharpest angle corner of the glass (so the bottom one closest to the vent panel - if you haven’t heard about geometry before) Red grease, red grease, RED GREASE! Top the inserted paracord with RED GREEEAAASE. now insert the quarter glass assembly starting from the sharpest corner, aiming to get the metal flange in between the sealing lip and with end of paracord inside of the car. Try to fit as much length of the seal correctly (lip inside)  until you’ll be stuck with power-loss in your lungs. Now tie both ends of paracord  together, push the glass from outside with one hand and slowly pull the paracord from the inside. Observe the sealing lip closely, especially when the paracord approaches corners – make sure nothing wrinkles. Pull the paracord completely – there you go, your rear quarter glass reinstalled. Push the rubber seal from outside hundred of times across its length to make sure it settles correctly. Unfortunately, most of crucial photos are missing as my hands were slightly dirty.

10.    Repercussion

It’s time to clean the leftovers of your rework/fitment. Generally, you have two options.
First Option – you are going to clean it by yourself and if you will choose to do it straight after reassembly – there is 99.999% chance that you won’t get dirtier than you actually are. You will need to sacrifice entire collection of hotel-stolen towels and few cans of WD40 Degreaser. You will be tired and exhausted on completion. I don’t need to mention that this option is for pussies, yes-man-s and absolute wankers.

Second Option – use your condition as advantage. If you fulfilled critical requirement from point 8 - red grease mixed with white clothes looks pretty scary, you may be lucky if none of your neighbours called emergency services already…All you need now is a hatchet – just grab it and go to your neighbours. Ask them would they mind to help you with cleaning, highlight the fact that your wife refused already.

Share by: